7 Tips to Fit Graphics Perfectly in InDesign Frames
Fitting an image perfectly into a frame in Adobe InDesign can be a challenge. It’s important to avoid distortions, distracting borders, or cropped subjects. Adobe InDesign offers you intelligent tools to let you precisely adjust images in frames. In this article, we show you the most effective tools for picture-perfect adjustments of your images — directly in Adobe InDesign.
1. Fill Frame Proportionally
The option “Fill Frame Proportionally,” one of Adobe InDesign’s Frame Fitting controls, scales the image to fill the frame completely while maintaining the proportions of the image.
Be careful: If the image and frame have different aspect ratios, areas of the image that fall outside the frame will be cropped.
This option is suitable for layouts in which the image should fit seamlessly to the entire area, flat and without any borders.

2. Fit Content Proportionally
The option “Fit Content Proportionally” preserves the original aspect ratio of the image — the image will not be distorted. If the image format does not exactly fit the frame, white areas or empty areas become visible. This option is perfect for layouts in which the integrity of the image is more important than displaying an image that fills a frame.

3. Content-Aware Fit
Adobe InDesign uses artificial intelligence in the option “Content-Aware Fit” to recognize the most important area of an image: the optical center. The central area of the motif therefore remains in focus, while less important parts of the image are automatically cropped. This function saves time when dealing with portraits, product photos, and evocative images with a clear visual message.
4. Fit Frame to Content
The option “Fit Frame to Content” causes the frame to be resized to fit its content, the image. Adobe InDesign resizes the frame to fit the exact original dimensions of the image. This option is especially practical when you wish to retain the original proportions and dimensions of a photograph fitted to a frame.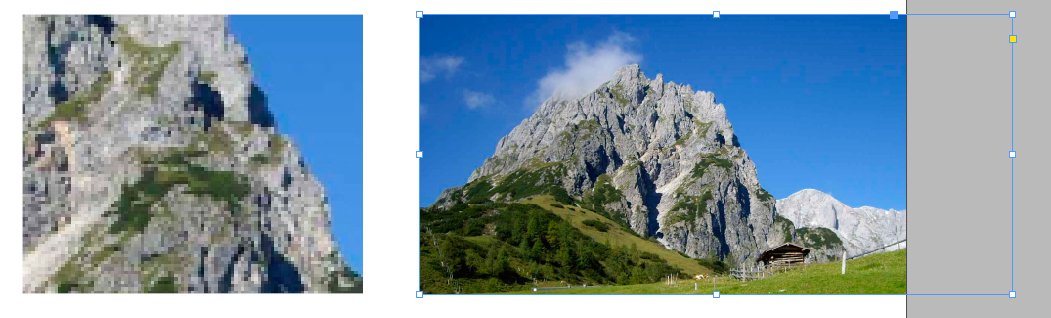
5. Fit Content to Frame
When the image must exactly fit the frame, the function “Fit Content to Frame” forces the image to fit the exact dimensions of the frame. This can result in a distorted image from the image not being resized or scaled proportionally. This option is therefore best used only with geometric or abstract motifs for which the aspect ratio of the image does not play a role.
6. Center Content
With one click, the image is centered in its frame. This feature works perfectly in combination with the scaling options mentioned above to align images quickly and precisely within the layout.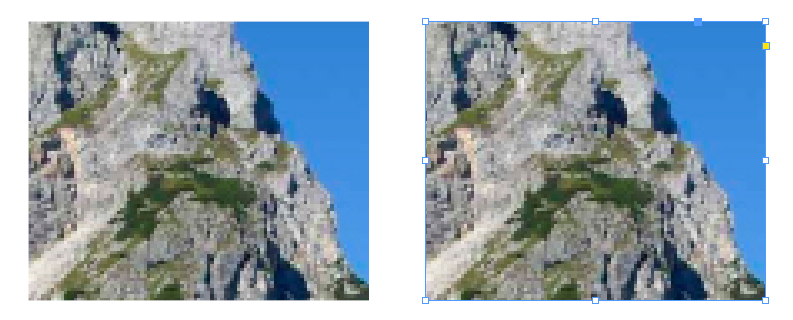
7. Interactive Adjustment: Use the Mouse to Create the Perfect Shot
Hover your mouse pointer over a inserted image and click and drag it within the frame to move it — the image frame itself remains unchanged. This allows you to intuitively and visually determine the perfect image crop directly within the layout. By dragging the edges of the image, you can also adjust the image size without changing the image frame itself.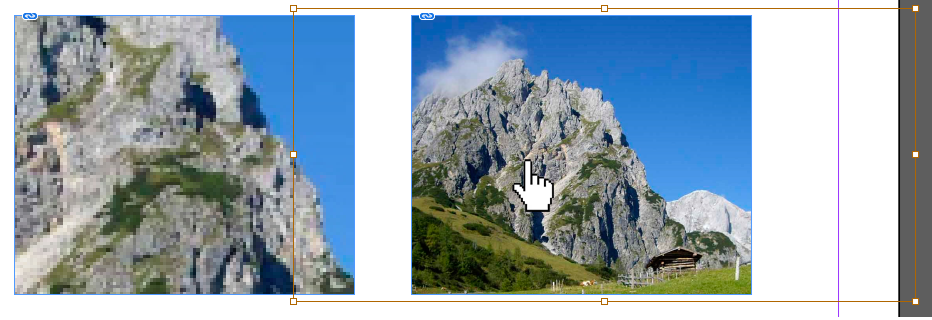
Contact the Adobe InDesign experts at T+S ...
… if you wish to automate Adobe InDesign.